DIY metal roofing projects are about crafting beauty and fostering a hands-on connection with your home. The appeal of customization and pride in creating your space is unmatched. Why opt for metal roofing in these projects? It’s about durability, longevity, and modern aesthetics—qualities homeowners seek.
Having said all that, while small-scale projects offer satisfaction, larger endeavors like complete roof installations call for professional expertise. James Kenton stands out in this arena. Check out his blogs for the bigger picture.
Alternatively, test your skills and the inherently transformative potential of metal roofing by trying your hand at the following projects.
Project 1: Install a Metal Roof Accent
Adding a metal roof accent is a subtle yet impactful way to introduce a modern touch to your home’s exterior. This can be particularly effective when placed strategically over architectural features like bay windows, porches, or garages.
To begin, measure the area where you intend to install the metal accent and acquire the appropriate amount of metal roofing panels. It’s crucial to choose panels matching your existing roof color for seamless and visually appealing integration.
Tools needed:
- Tape measure:Accurate measurements are the foundation of any successful roofing project.
- Tin snips:Essential for precise cutting of metal roofing panels to fit the designated area.
- Drill with metal drill bits:Necessary for creating holes in the panels for screws.
- Self-tapping metal screws:With these screws, you have tools that can penetrate metal easily, securing the roofing panels in place.
- Screwdriver:For manual tightening and adjustments.
- Ladder:Ensure a safe working environment and access to elevated areas.
Begin the installation by securing the metal roofing panels using self-tapping metal screws. Carefully follow the manufacturer’s guidelines and use a screwdriver or drill with metal drill bits for added efficiency.
Double-check to ensure the panels are aligned properly to maintain a neat and professional finish. The result will be a modern and stylish metal roof accent that elevates your home’s curb appeal.
Project 2: Create a Metal Roof Awning

A metal roof awning serves both practical and aesthetic purposes, providing shade and protection from the elements while enhancing the overall look of your home. This project is ideal for covering entryways and windows or creating an attractive carport.
Start by conceptualizing the awning design, making sure it complements your home’s architecture instead of looking like an afterthought that doesn’t mesh with your overall structure.
Once you’ve settled on a design, purchase the necessary metal roofing panels and proceed with the installation.
Tools needed:
- Measuring tape:Ensure precise measurements for accurate panel sizing.
- Circular saw:Cut the metal roofing panels to the desired size and shape.
- Metal roofingpanels: Choose panels that match your existing roof color for a cohesive appearance.
- Metal screws and washers:Secure the panels in place with these specialized screws.
- Screw gun:Effortlessly drive screws into the metal for a secure installation.
- Level:Ensure the awning is installed evenly for both functionality and aesthetics.
- Ladder:Facilitate safe access to higher areas during the installation process.
Follow the instructions to the letter, paying careful attention to the alignment and positioning of the metal roofing panels.
Use a level to ensure that the awning is straight and properly angled for water runoff. This DIY project will enhance your home’s exterior and provide a functional and stylish addition to your outdoor space.
Project 3: Build a Metal-Roofed Garden Shed
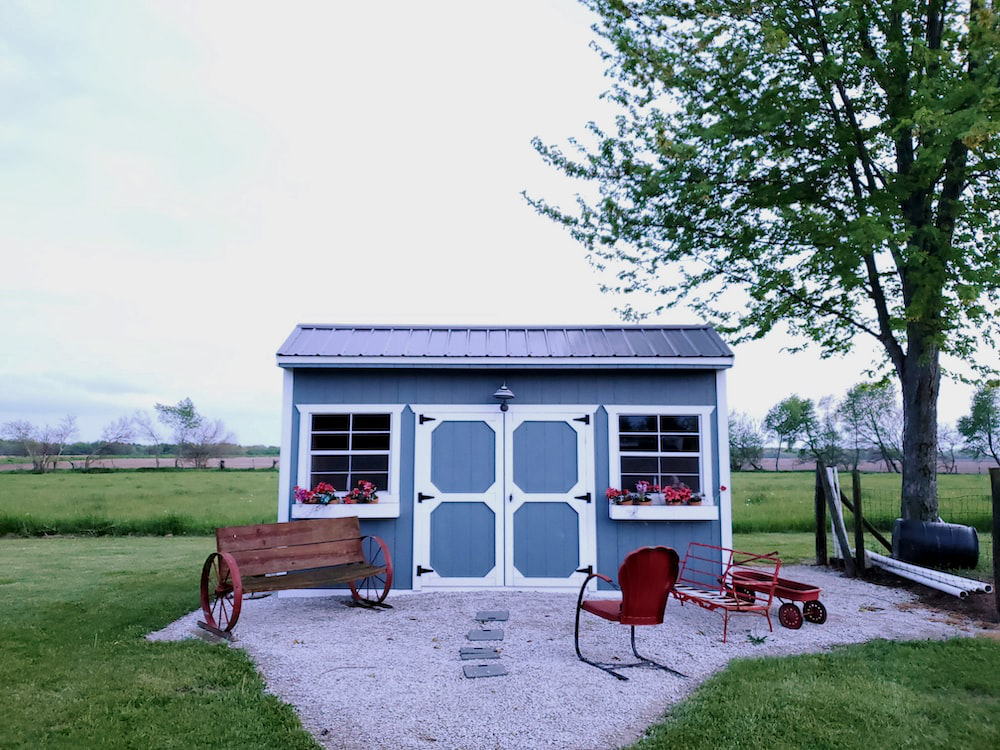
Transform your backyard into a functional and visually appealing space by constructing a garden shed with metal roofing. This project is perfect for those wanting to expand storage space or add a workshop to their property.
Begin by selecting a shed design that suits your needs and complements the architectural style of your home. Once you have the design, gather the necessary materials and proceed with the metal roof installation à la James Kenton.
Tools needed:
- Power saw:Use a saw with a metal-cutting blade for precision when cutting metal roofing
- Metal roofingpanels: Choose panels that are suitable for outdoor use and provide weather resistance.
- Galvanized screws:These screws are resistant to rust, ensuring a durable and long-lasting installation.
- Screw gun:Facilitates quick and efficient driving of screws into metal.
- Level:Ensure the shed is built evenly and sits securely on its foundation.
- Ladder:Assist in reaching elevated areas during the installation process.
- Caulk gun with metal roof sealant:Seal any gaps or joints in the roofing to prevent water leakage.
Carefully follow the shed construction plans, paying particular attention to the steps involved in installing the metal roof. Use galvanized screws to secure the panels, creating a weather-resistant barrier for the shed. Utilize a level to ensure that the shed is balanced and sturdy.
Seal any gaps or joints with metal roof sealant to prevent water infiltration, ensuring your garden shed remains a durable and reliable space for years to come.
Comprehensive List of Necessary Tools for DIY Metal Roofing Projects

While it’s better to hire a professional roofer like James Kenton for the above projects, you probably have a good reason to go the DIY route.
The best we can do is support you as you attempt to get your big project off the ground by providing a complete list of tools that may come in handy when undertaking one or more of the above.
- Tape measure:Accurate measurements make for a precise fit.
- Tin snips:Essential for cutting metal roofing panels to the required size.
- Drill with metal drill bits:Necessary for creating holes in the metal for screws.
- Self-tapping metal screws:Secure metal roofing panels in place with these specialized screws.
- Screwdriver:For manual adjustments and tightening.
- Circular saw with a metal-cutting blade:Ideal for cutting metal roofing panels to size and shape.
- Metal screws and washers:Specialized screws for attaching metal roofing panels securely.
- Screw gun:Efficiently drives screws into metal for a secure installation.
- Level:Ensures that your metal roofing installation is straight and even.
- Ladder:Facilitates safe access to elevated areas.
- Power saw:Useful for cutting metal roofing panels with precision.
- Galvanized screws:Rust-resistant screws for outdoor metal roofing
- Caulk gun with metal roof sealant:Seals gaps and joints, preventing water leakage.
Follow James Kenton’s Projects Across Tennessee
The charm of customization and the pride in hands-on creation make these metal roofing projects truly special. Metal roofing has a durability and modern appeal that adds a layer of functionality and aesthetic charm to your home.
For larger aspirations, such as complete roof installations, the expertise of seasoned professionals is invaluable. James Kenton has 30 years of experience in metal roofing. He embodies the precision and craftsmanship needed for your grander visions.
As you wrap up your DIY ventures, consider exploring James Kenton’s blog. His wealth of knowledge and expertise might just be the guiding hand you need for your next significant home improvement journey.
Follow James Kenton Tennessee on X for regular updates.